# Assignment List
# 1. Github Hosting
Start by downloading this project in a .zip file.
You will be turning this project into your own hosted Github website.
Expand the zip folder and open the folder in VSCode.
Next, edit the index.html file and add your name in the <header> <h2>. Then save the edits.
Next, you will need to turn this project folder into a Git project by opening the Terminal panel in VSCode and running the git init command. Now your project IS a git repository.
Now add a .gitignore file at the root of your project folder. The .gitignore file should contain these two lines:
.DS_Store
node_modules/
2
Then run the git add and git commit commands so Git will be tracking your project files and recording the changes.
Now you need to set up a connection between Github and this Git repository. Do this by visiting the Github website (opens new window). Make sure you are logged in to the website using the
Github account that you created with your @algonquinlive.com email address.
Create a new PUBLIC Github Repository WITHOUT a Readme file and WITHOUT any licence information.
Save the URL of your new public github repository and go back to VSCODE.
Run the command in the terminal panel:
git remote add origin <URL-OF-YOUR-GITHUB-REPO>
Once you have added the remote url to your local git repo, now you can upload the project to Github from the Terminal panel. Here is the command to upload your project
git push origin main
You should be able to refresh the Github repository webpage in the browser and immediately see the uploaded files.
Next, go to the Settings tab for your Github copy of the repository and look for the menu entry called Pages. It should look like this:
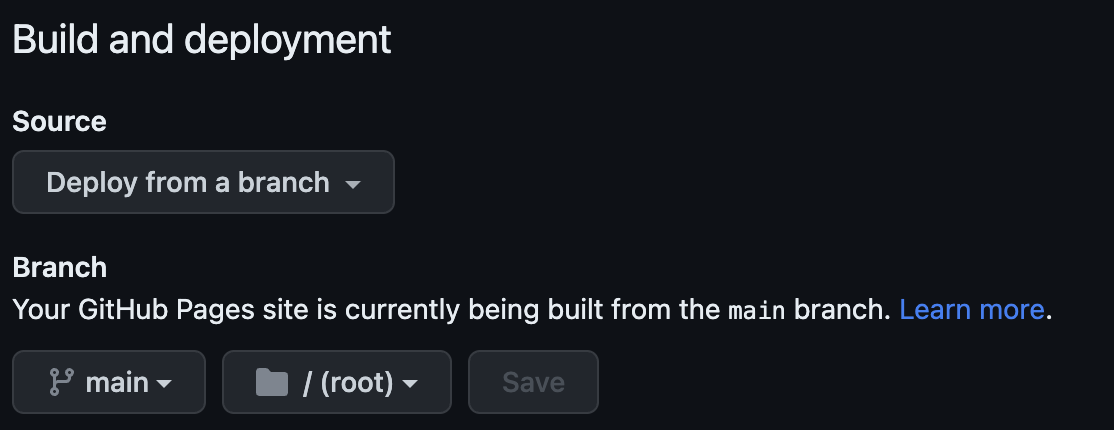
Set it to point to your main branch at the /root and click Save.
The page should display the URL for the hosted version of the project.
Within a couple minutes you should be able to see the actual hosted version of the project. If you click on the actions tab at the top, then you can see if the creation of the site is pending, being
processed, or complete.
Note If you set your repository to PRIVATE then you will need to have also created your Github Education account AND you will need to go to the
Collaboratorssection of the settings plus add your instructor as a collaborator for the project so they can access your repository.
# Submission
Due Date **Week 6**
(See BS LMS for exact date)
You will need to post TWO URLS in BS LMS on the assignments page as your submission.
- The URL for the Repo.
- The URL for the hosted Github Pages website.
# 2. DOM Content
Start with this code (opens new window).
Create a new project folder in VSCode. Copy these three files into that folder. Use git init to make it a Git repository.
Add the .gitignore file. Run the git add and git commit commands to track and save the starter code files.
Create a PRIVATE github repository for this project called dom-content, and then use git remote add origin <URL> to connect your local repo to the one on Github.
Follow the instructions in the main.js file to write the required JavaScript.
Add your own name to the <header><h2> in the HTML.
Update the CSS to add your own CSS colour scheme. Add CSS variables for the colours and the font-stack. All your colours and fonts in your CSS should use these variables. Eg:
:root {
  --background: blue;
  --headingText: white;
  --fontstack: Arial, Tahoma, Helvetica, sans-serif;
}
2
3
4
5
When you are done, use git add, git commit and git push to save and upload your site to the Github copy of the repository.
You will need to invite your instructor as a collaborator in the Settings section.
# Submission
Due Date **Week 7**
(See BS LMS for exact date)
Invite your instructor to the Github repository.
Submit the URL for your private repo on the Assignments page in BS LMS.
# 3. DOM Events
Start with this code (opens new window)
Create a new project folder in VSCode. Copy these three files into that folder. Use git init to make it a Git repository.
Add the .gitignore file. Run the git add and git commit commands to track and save the starter code files.
Create a PRIVATE github repository for this project called dom-events, and then use git remote add origin <URL> to connect your local repo to the one on Github.
Follow the instructions in the main.js file to write the required JavaScript.
Add your own name to the <header><h2> in the HTML.
Update the CSS to add your own CSS colour scheme to the CSS variables.
Customize the CSS in some way to make it unique. Use this as an opportunity to practice your CSS skills from MAD9013. Focus on the page being responsive and accessible.
When you are done, use git add, git commit and git push to save and upload your site to the Github copy of the repository.
You will need to invite your instructor as a collaborator in the Settings section.
# Submission
Due Date **Week 10**
(See BS LMS for exact date)
Invite your instructor to the Github repository.
Submit the URL for your private repo on the Assignments page in BS LMS.
# 4. Fetch Basic
For this assignment you are to use the Github REST APIs (opens new window). You can use either the Octokit library or the plain fetch() approach to calling the API. The plain
vanilla JS fetch call is simpler for this assignment.
Your assignment is to create a webpage that will make API calls to Github for the list of repositories that belong to a user OR a list of followers for a user.
The URL you will be calling is https://api.github.com/users/{username}/repos OR https://api.github.com/users/{username}/followers. Your webpage should have an <input type="text" /> and a
<button>.
The user will enter a username in the input and then click the button. This needs to trigger the API call. Take whatever the user typed in the input, do a trim() on the value and then put that value
in the URL in place of the {username}.
If the trimmed string value from the input is empty, then do NOT make the fetch call.
If no matches come back, you need to display a message on the page about there being no match.
If you do get a valid list of repos, then display those on the page as a series of HTML elements like this:
<!-- for repo list -->
<li>
  <p><a href="${html_url}" target="_blank">${name}</a></p>
  <p>Watchers: ${watchers}</p>
  <p>Open Issues: ${open_issues}</p>
</li>
2
3
4
5
6
The text in the anchors should be the name or login property of the repo object. The value of the href attribute should use https://www.github.com/ plus the value from the full_name or url
property as the link. The value of the img src attribute should use the value from the avatar_url property.
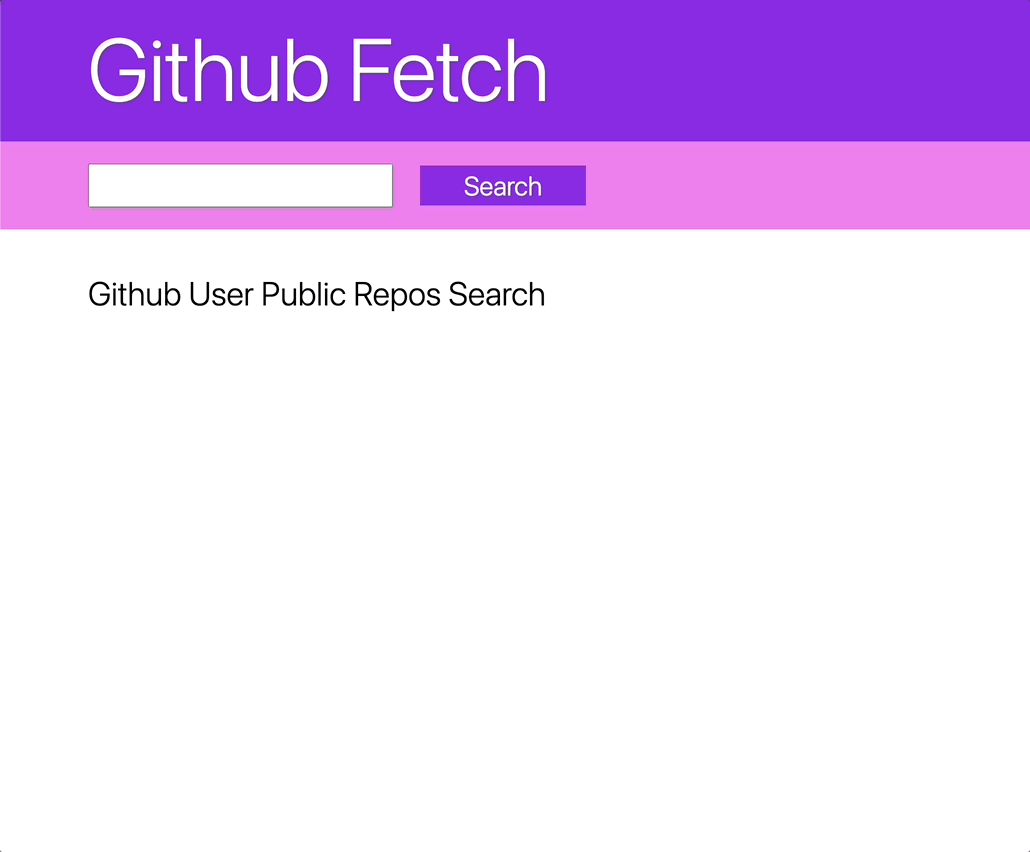
# Demo Animation
This screen capture shows the idea behind what your web app should be doing.
# Submission
Due Date **Week 11**
(See BS LMS for exact date)
Create a private Github Repo called fetch-github.
After you have uploaded your code, go to the Settings page and click on the Collaborators link in the left-hand menu. Add your instructor as a collaborator to your repo.
Open BS LMS and go to the Activities > Assignments page.
Go to the Fetch Github assignment and submit the link to your repository into the text area. Then submit the form and look for confirmation.
# 5. Data Management
This exercise is about fetching some data and then manipulating that data after it is loaded.
Start with this code (opens new window).
Create a new project folder in VSCode. Use git init to make it a Git repository. Add the files from the Code Gist.
Edit the <header> <h2> element to add your name.
Add the .gitignore file. Run the git add and git commit commands to track and save the starter code files.
Create a PRIVATE github repository for this project called data-mgmt, and then use git remote add origin <URL> to connect your local repo to the one on Github.
In your JavaScript, the fetch call can be triggered by the page loading or by the user clicking a button that you put in the HTML.
Make the fetch call to the https://random-data-api.com/api/v2/users for the users endpoint. Use the size=50 value in the querystring. This will retrieve an array of 50 users.
Take the JSON from the fetch, turned into an Array (with the response.json() method) and then make the following modifications:
- filter the array to only keep objects where
state==CaliforniaorTexasorAlaska. - map the array so each remaining object only contains the properties:
uid,full_name(combining first_name and last_name),email, date_of_birth renamed asdob,city,state,latitudeandlongitude.
After making the modifications, output the modified array inside a <pre></pre> element in the provided html.
After you have pushed your code to the private Github repo, go to the settings and add your instructor as a collaborator.
Also, go to the Settings > Pages area for your Github repo and set up github pages to use the /root of the main branch to host the website.
# Submission
Due Date **Week 12** (See BS LMS for exact date) :::
After you have uploaded your code, go to the Settings page and click on the Collaborators link in the left-hand menu. Add your instructor as a collaborator to your repo.
Open BS LMS and go to the Activities > Assignments page.
Go to the data-mgmt assignment and submit the TWO links:
- to your repository
- the link to your github pages version into the text area.